
Setting up the COMPUSHIFT Handheld Dashboard Displays
Overview
The COMPUSHIFT handheld display can do most of the things that the CS Setup App can do, but the way the gauges work is very different.
Here are the basics:
There are four configurable gauge screens on the handheld display.
Each screen can have up to 8 gauges.
The gauges are numbered 1-4 in the first column, and 5-8 in the second column.
Some of the gauges can be full screen or half screen.
Full screen gauges only work in position 1.
Half screen gauges only work in positions 1 and 5.
GAUGE 1 | GAUGE 5 |
GAUGE 2 | GAUGE 6 |
GAUGE 3 | GAUGE 7 |
GAUGE 4 | GAUGE 8 |
You can configure these screens either from the CS Setup App or from the handheld display itself.
Using the CS Setup App
While connected to the COMPUSHIFT controller, select the “Display Setup” menu. This will show you the following screen:
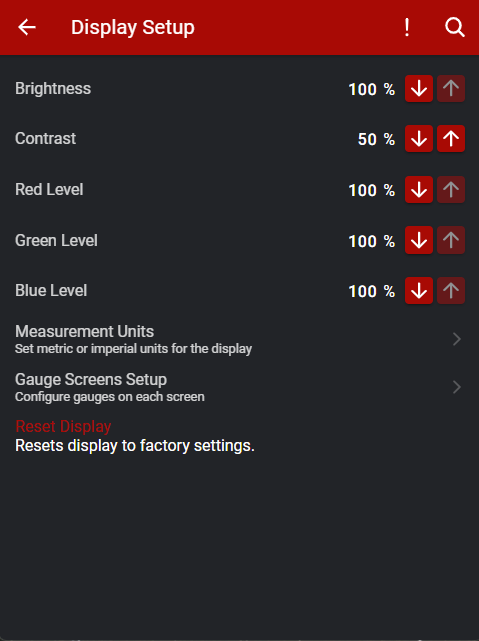
From here, you can adjust the brightness, contrast, and display colors, as well as the measurement units being used on the display.
Changing the measurement units for the display does not change them in the CS Setup App.
If you click on the “Gauge Screens Setup”, you are presented with 4 tabs (one per screen), and 8 possible gauge selections.

Selecting the tabs along the top of the menu changes which gauge screen is being edited. In each screen, you can change the function of any gauge by selecting it.
You’ll be presented with a list of possible gauge items in a list, like this:
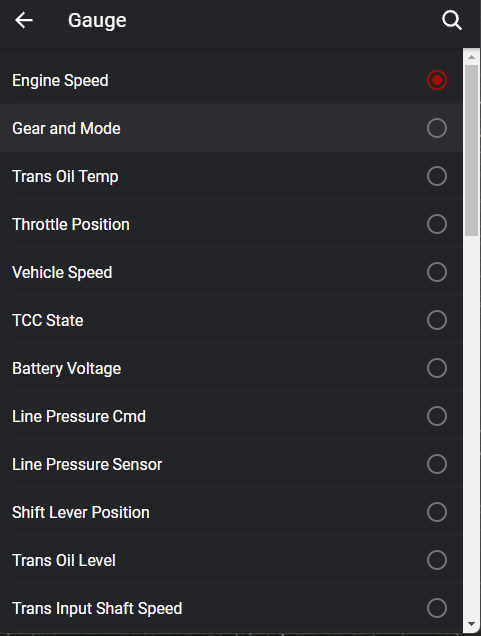
There are many possible signals that can be monitored, and not all transmissions support all signals. If you choose a signal that is not active, you will get a gauge label, but no data.
Using the Handheld Display to Configure the Gauge Screens
Each gauge screen on the handheld display can be customized using the display keys.
A single press of the center button starts to edit the screen. A blinking cursor will show which gauge is being edited.
Up and down arrows move among the gauges, moving down from 1 to 4, and then jumping to the second column to move through 5 to 8.
The left and right arrows change the gauge in each position.
Pressing the upper dot button will restore the screen to its default setting.
A single press of the center button completes and saves the edited screen. The blinking cursor will disappear.