
Installing and Using an A-B Mode Switch
Overview
Some COMPUSHIFT controllers offer an A-B mode feature. This allows you to configure two different calibrations (A and B) for your system in advance, and then switch between them easily.
For example, you could configure Mode A for performance driving and Mode B for hauling heavy loads.
The controller requires a push button normally open switch that connects to ground when pressed. Some controllers offer an output to drive an LED to indicate when the manual TCC function is enabled.
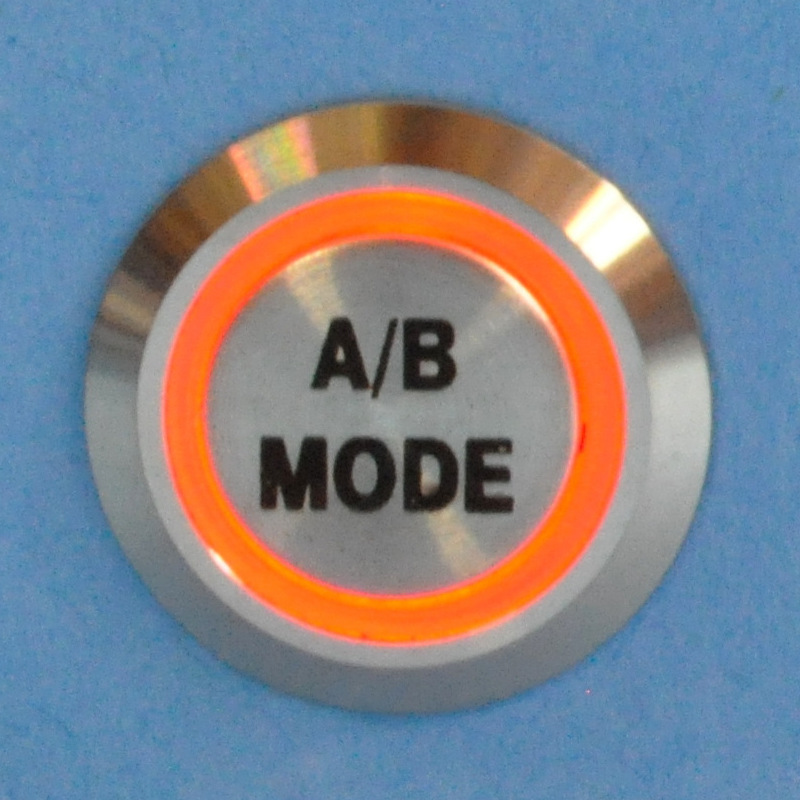
HGM offers an engraved billet A/B Mode switch that features a ring LED lamp.
Installing the HGM Billet Switch
Locate a position that is easy to reach from the driver's seat.
Drill a 19mm or 3/4" hole for the switch.
Install the switch from the front with the o-ring in place.
Install the nut on the rear of the switch. Tighten gently.
There are four wires on the switch harness as follows:
Wire Color | Function |
|---|---|
Black | LED Ground |
Red | LED Power |
Green | Switch Common |
Yellow | Switch Normally Open |
The black and yellow wires are normally supplied connected together into a ground lug. The LED can be safely powered by 12V, as there is a resistor in the switch.
The green wire on the switch connects to the COMPUSHIFT harness wire marked "MODE SWITCH"
The red wire from the switch connects to the COMPUSHIFT harness wire marked "MODE SWITCH LED"
Using the Switch
When you start the vehicle, the system will always start in Mode A.
To toggle between modes, press and hold the button for 3 seconds.
The LED on the switch will light when you are in Mode B.