
Installation on GM 700R4 / 2004R
Installing the Pressure Sensor
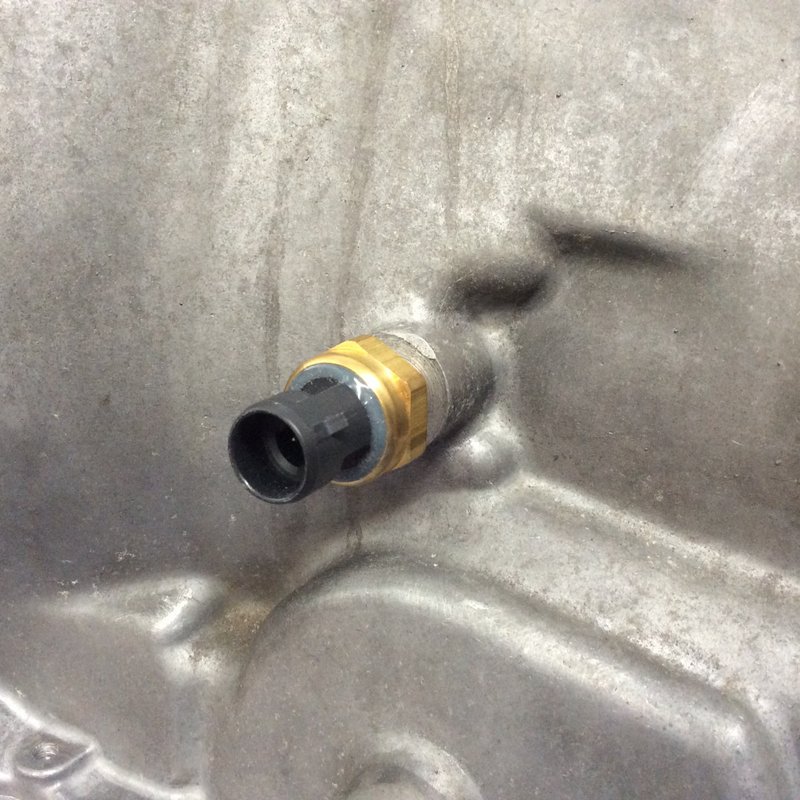
Locate the line pressure plug test port on the left side of the transmission, immediately behind the bellhousing.
The test port is usually capped off with a 1/8" NPT plug:

Clean the area around the plug and remove it using an appropriately-sized socket or wrench:

Put a small amount of PTFE / Teflon sealant on the pressure sensor or wrap it with PTFE / Teflon pipe sealant tape.
Thread the pressure sensor into the port. Tighten the pressure sensor until it is finger-tight, then use a wrench to tighten it another 1.5 to 3 turns, depending on feel.
Do not overtighten! The transmission case is made of aluminum and the pressure sensor is made of brass. Both are soft metals and will strip easily.
Installing the Speed Sensor
As installed in the vehicle, the transmission should have speedometer cable attached to the speedometer drive output of the tailhousing.
Clean the area around the end of the cable, and unscrew the cable nut from the drive output:

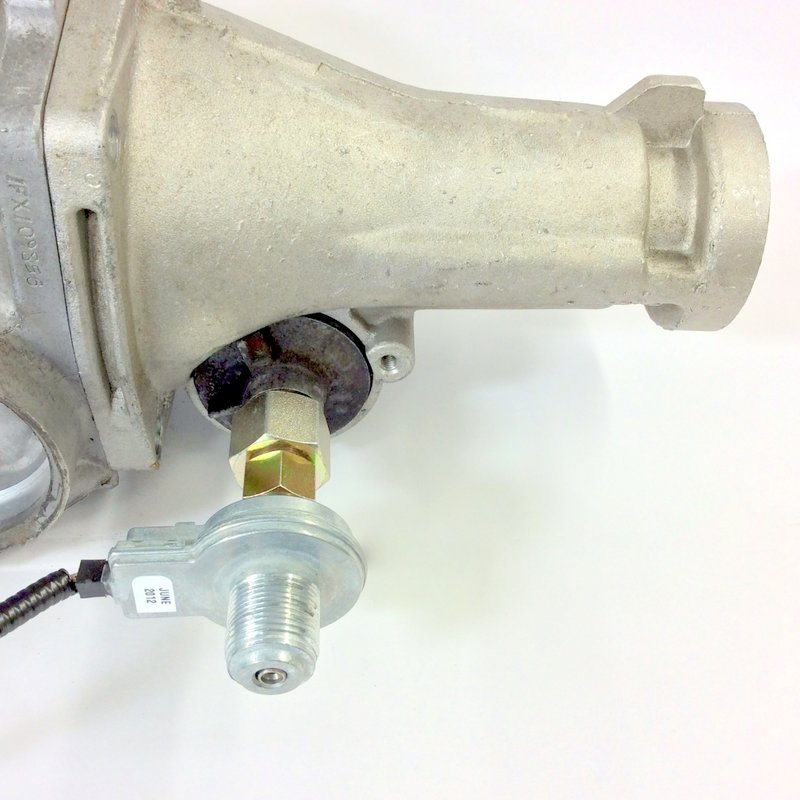
Remove the cable and set it aside. The drive output should look like this:

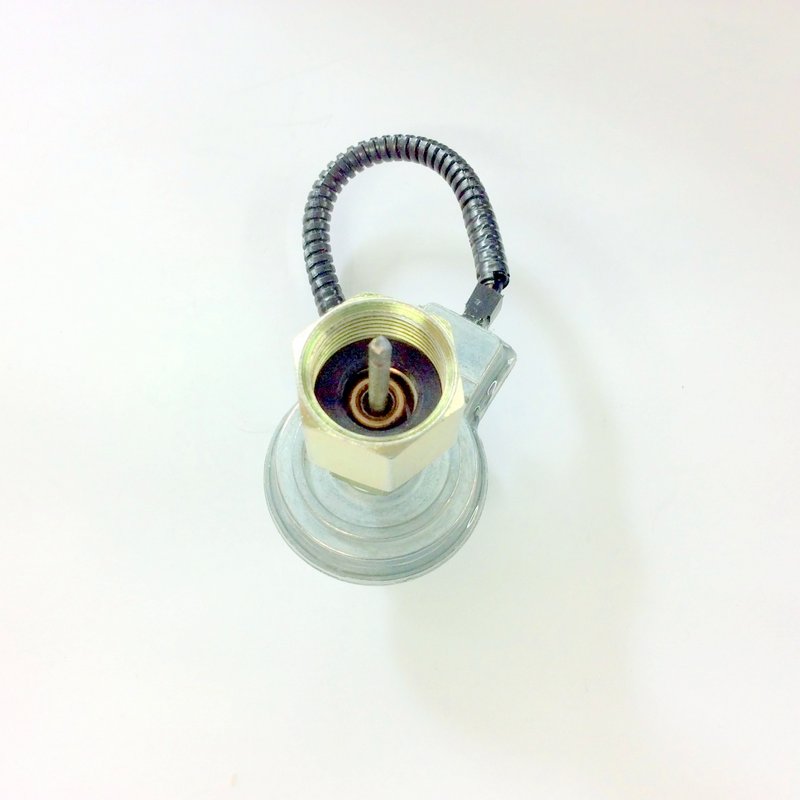
Locate the speed sensor you assembled earlier:
Screw the speed sensor into the speedometer drive on the tailhousing, being sure to engage the short cable inside the drive.
Snug the nut securely with a wrench ensuring that the speed sensor wires point toward the front of the vehicle:
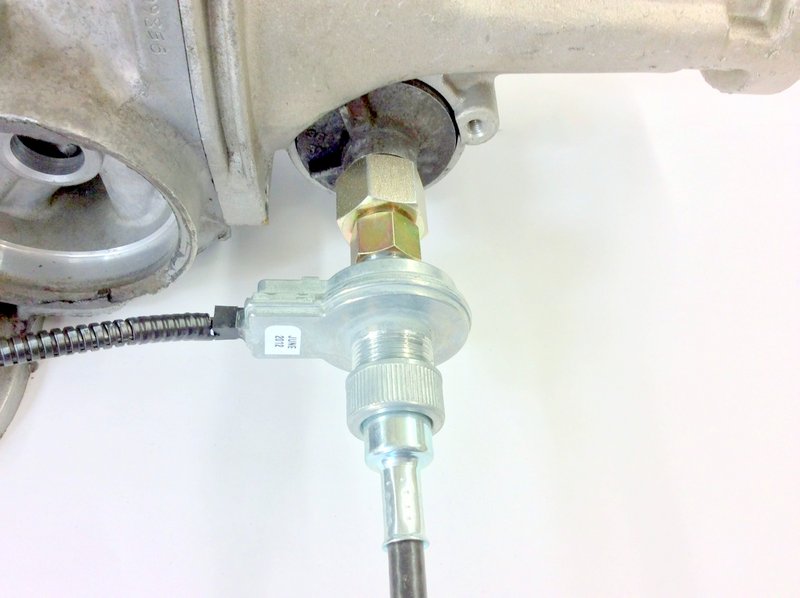
Reattach the speedometer cable to the output of the speed sensor:
Installing the Wiring Harness
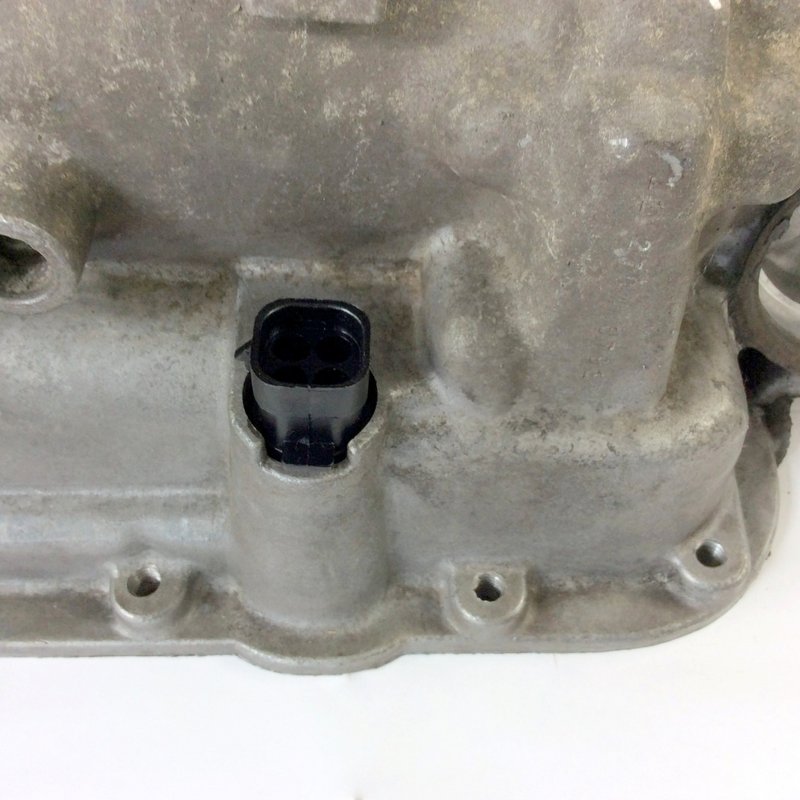
Earlier, you pushed the wiring harness through the firewall and installed the grommet. From the underside of the vehicle, locate the wire harness and begin routing it toward the right rear side of the transmission. Locate the transmission wiring socket, shown below:
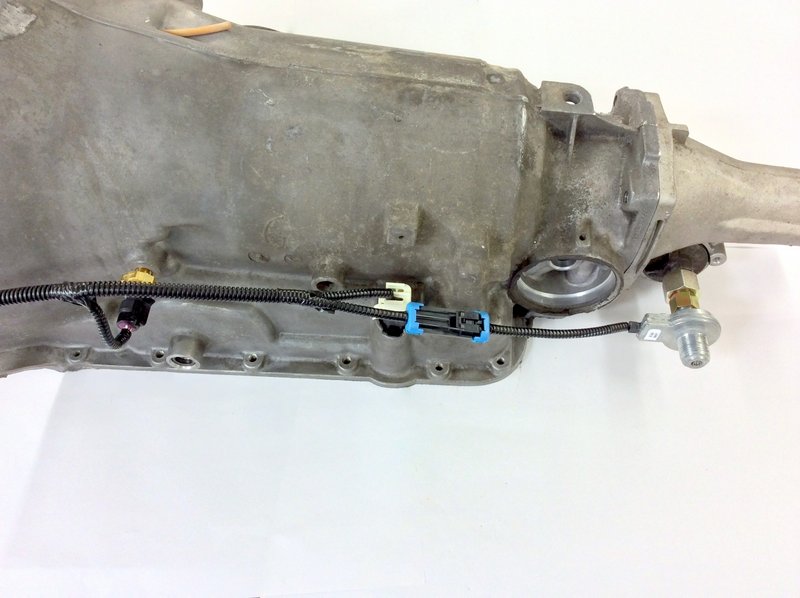
Connect the harness plug into the socket, and then connect the speed sensor at the tailhousing:

Then follow the wires of the harness to the front and plug in the pressure sensor:
Finally, use one of the provided cable ties to fasten the harness to the bellhousing as shown:

Use other cable ties as needed to fasten the wiring harness clear of any rotating parts, linkages, and the exhaust system.