
Installing the COMPUSHIFT Transmission Pressure Sensor Kit
This article applies to the COMPUSHIFT Sport and COMPUSHIFT Pro controllers.
This sensor kit connects to a transmission and displays line pressure on the setup app or display.
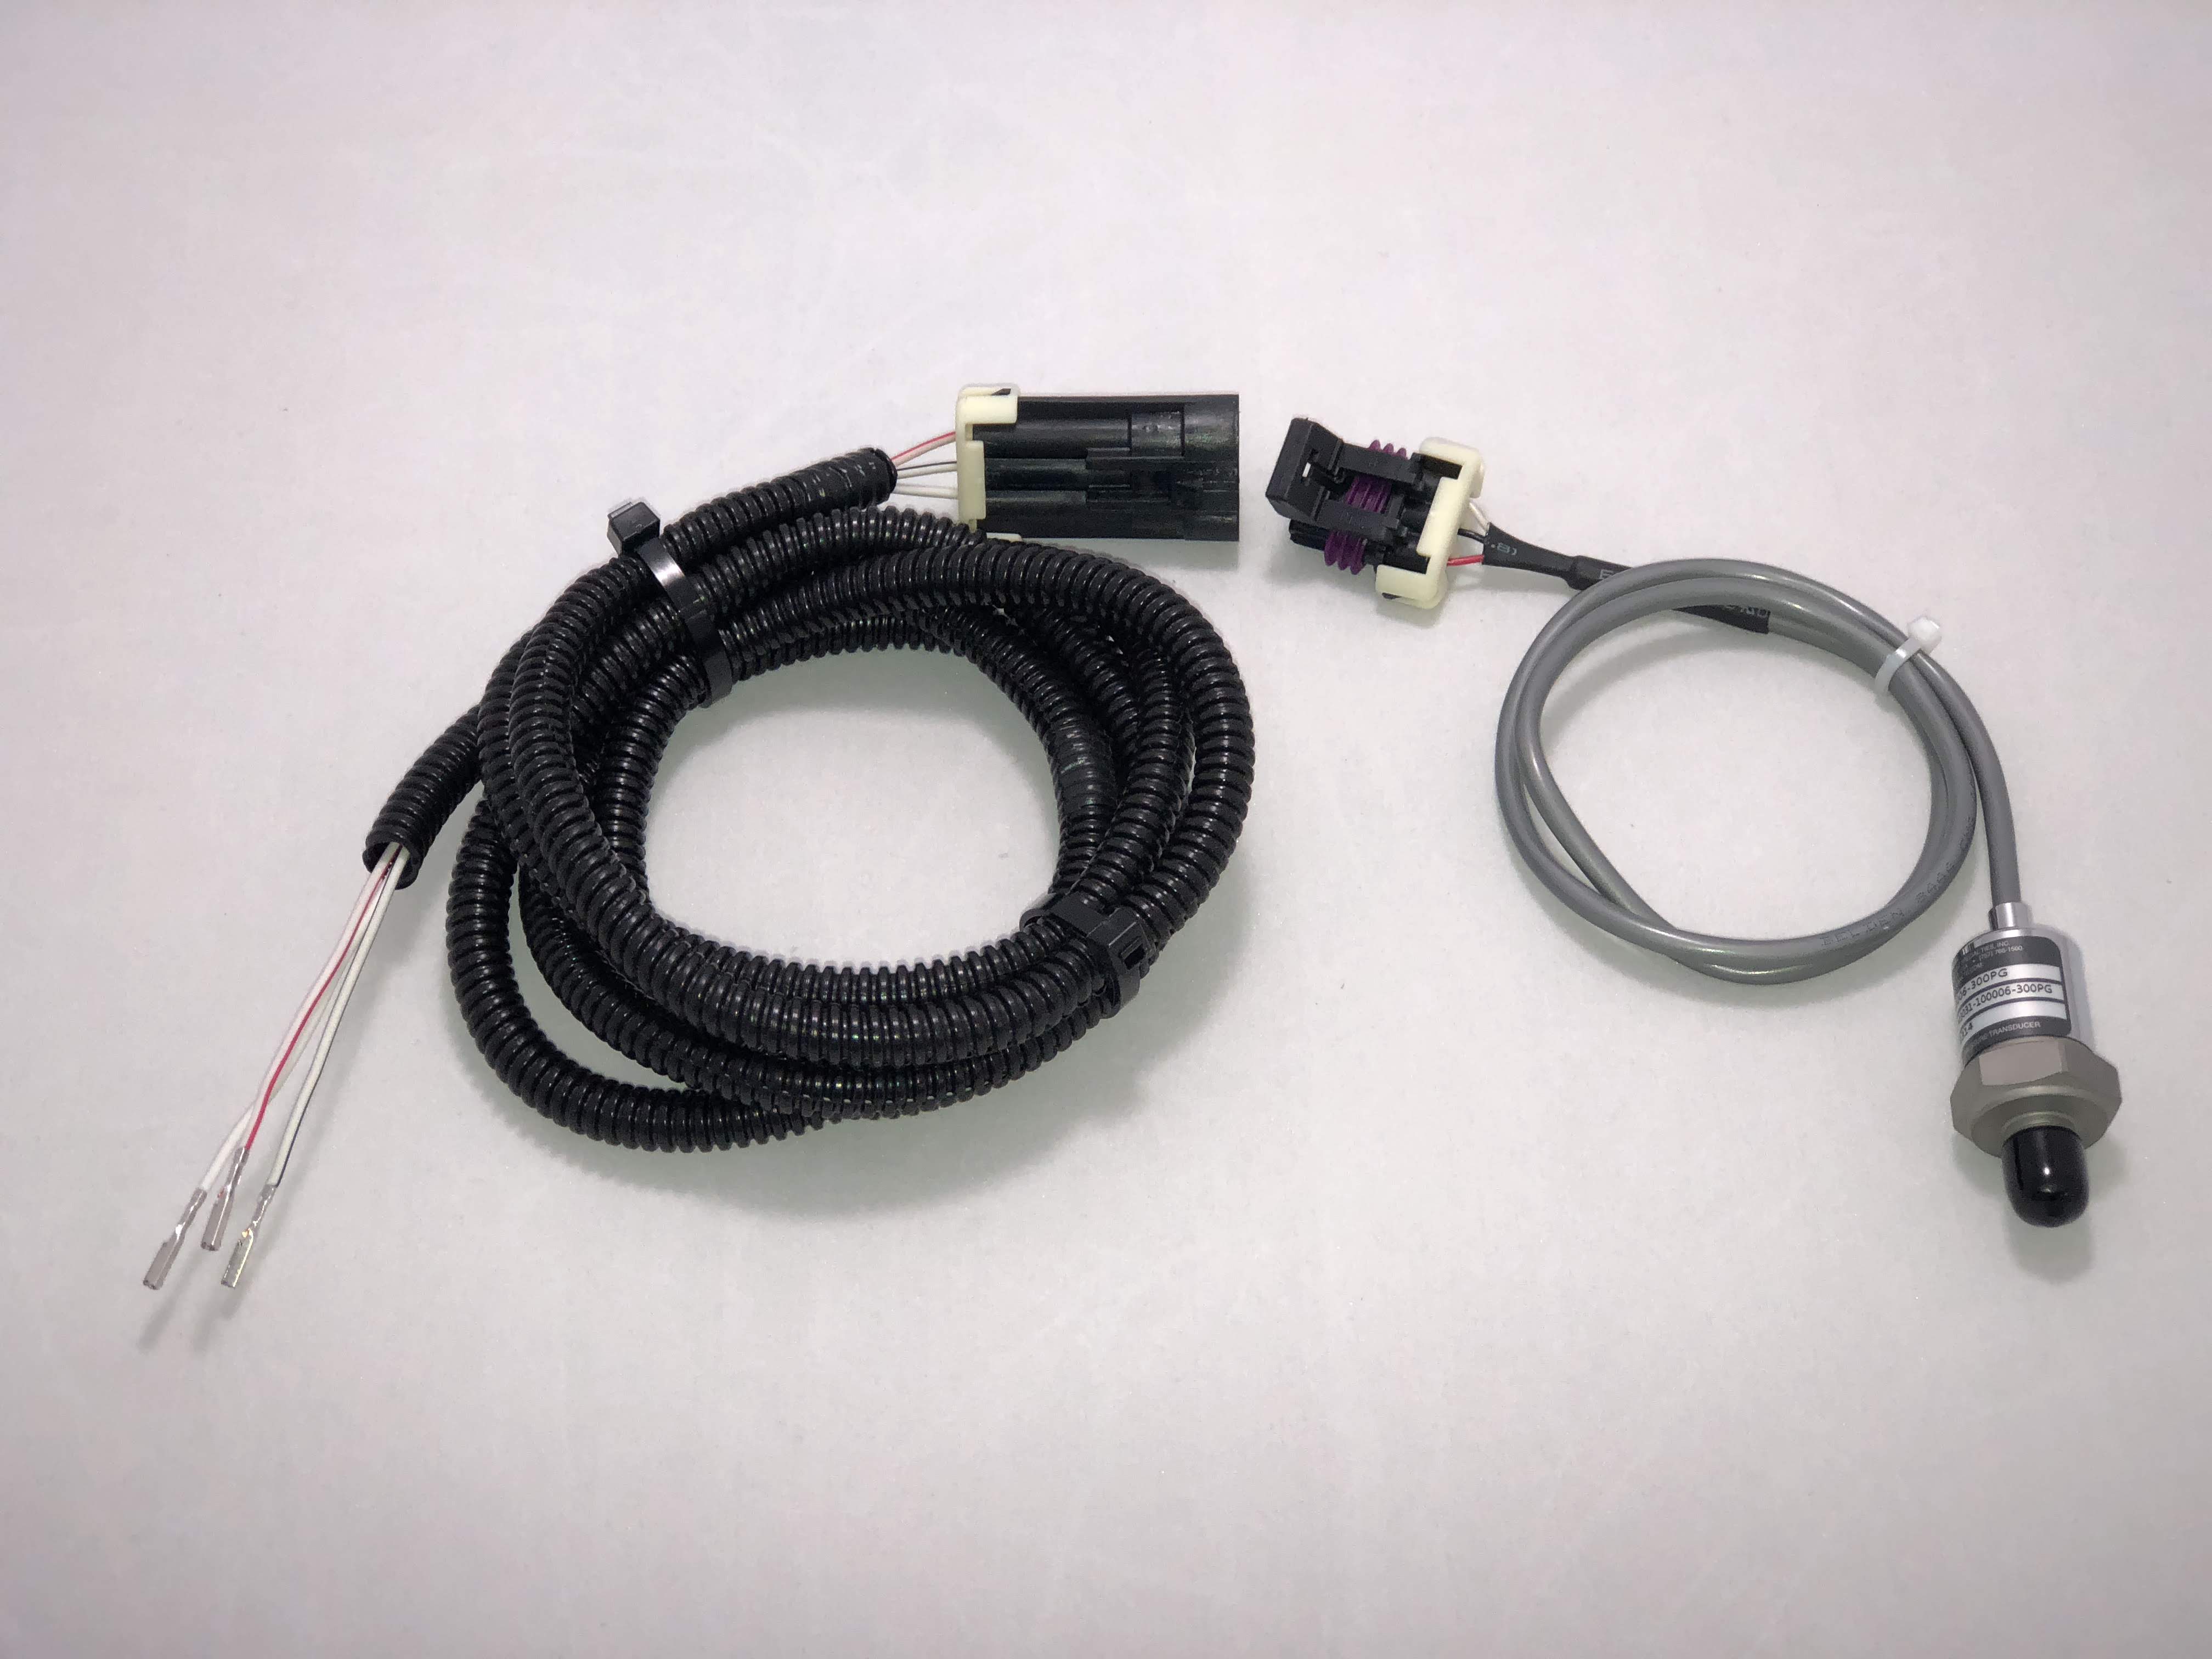
The kit consists of two parts: the sensor harness (6'/ 2 m long), and the pressure sensor itself.
The pressure sensor has a 1/8" NPT male fitting which fits many common transmission pressure test ports. On some transmissions, you will need an adapter or you may need to drill and tap a hole.
You will need:
Transmission Pressure Sensor Kit
Long nose pliers
Wire cutters
Adjustable wrench / spanner for pressure sensor.
Locate the pressure test port on your transmission and thread the sensor into the test port, ensuring that you do not over tighten it. Use of a small amount of liquid sealant is recommended. If space is at a premium, you may need to use a 90 degree elbow (not included) to fit the sensor flush to the side of the transmission.
After the sensor is installed on the transmission, you will need to add the sensor harness to the main COMPUSHIFT connector.
Adding the Pressure Sensor Harness to the Main Connector
Locate your COMPUSHIFT main harness connector and disconnect it, if needed, from the COMPUSHIFT controller.
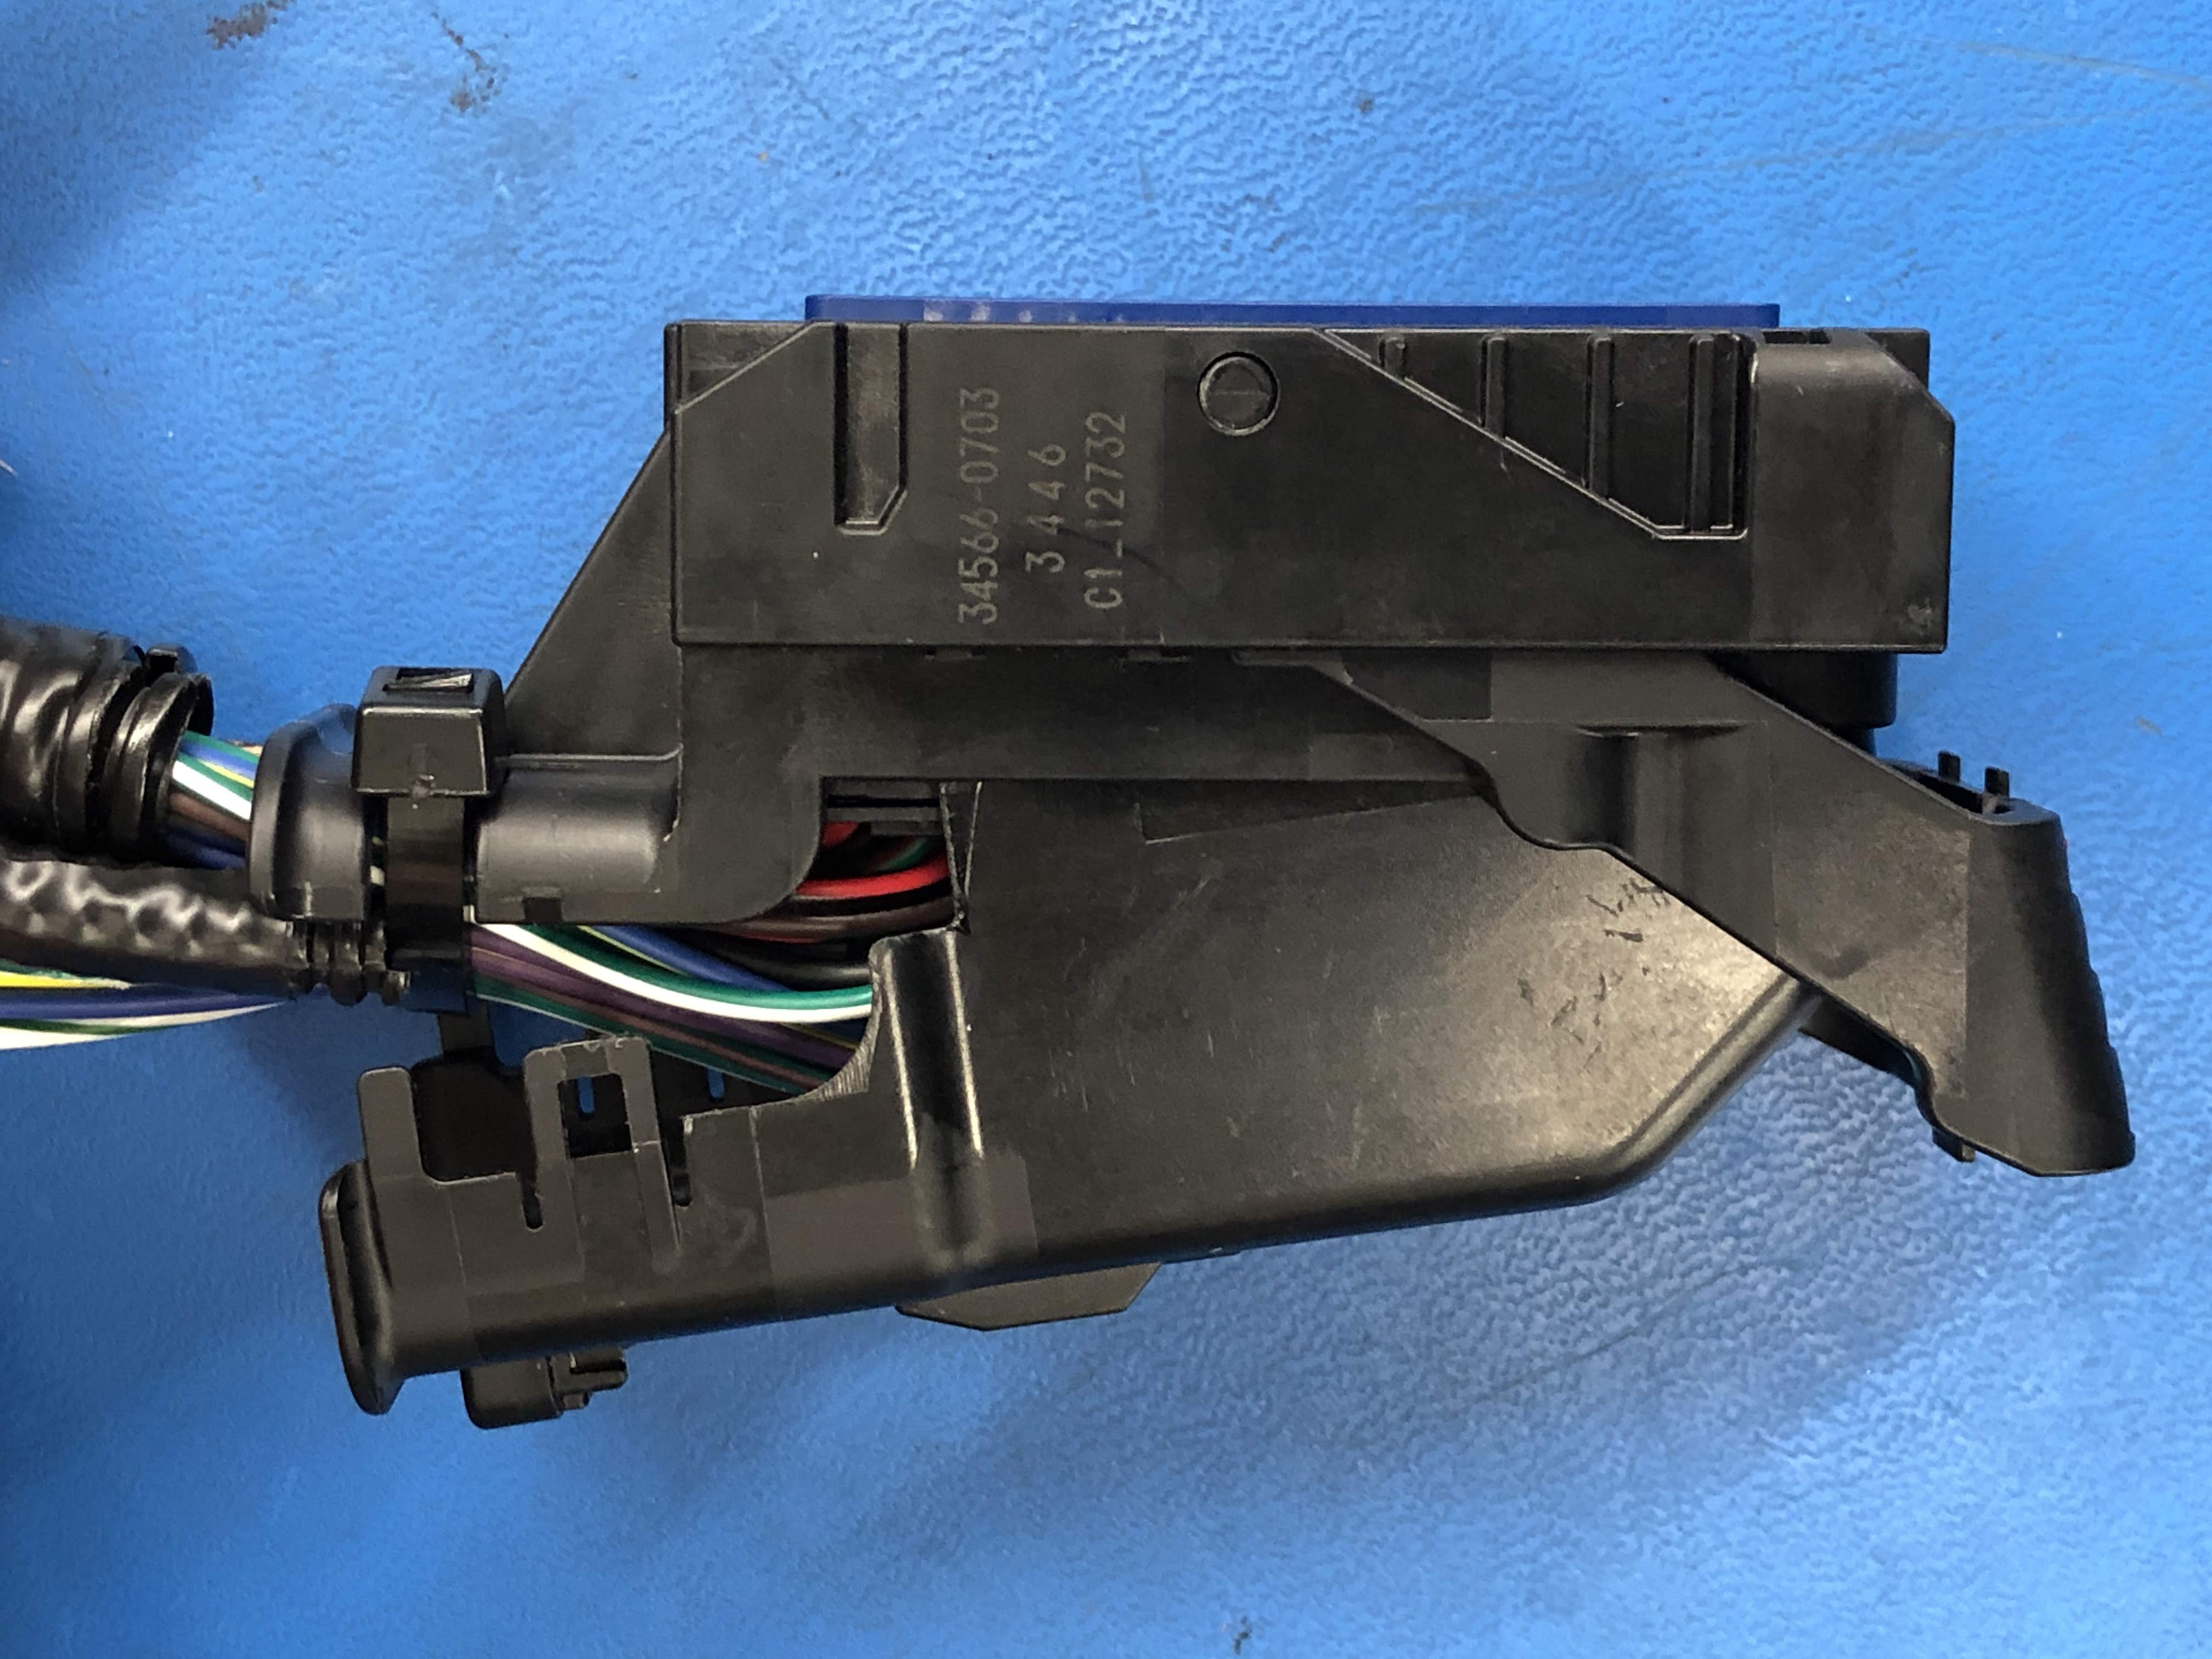
Remove the top cover shell from the lever lock connector by releasing the clips at the end and pivoting shell as shown. Cut and discard the cable tie holding the wires to the connector after the cover is removed.
This is a chart showing the pin numbering of the 80 way connector with the cover removed. The highlighted pins below, 9, 35, and 52 are the ones used for the pressure sensor.
LEVER | |||
80 | 60 | 40 | 20 |
79 | 59 | 39 | 19 |
78 | 58 | 38 | 18 |
77 | 57 | 37 | 17 |
76 | 56 | 36 | 16 |
75 | 55 | 35 | 15 |
74 | 54 | 34 | 14 |
73 | 53 | 33 | 13 |
72 | 52 | 32 | 12 |
71 | 51 | 31 | 11 |
70 | 50 | 30 | 10 |
69 | 49 | 29 | 9 |
68 | 48 | 28 | 8 |
67 | 47 | 27 | 7 |
66 | 46 | 26 | 6 |
65 | 45 | 25 | 5 |
64 | 44 | 24 | 4 |
63 | 43 | 23 | 3 |
62 | 42 | 22 | 2 |
61 | 41 | 21 | 1 |
CABLE TIE | |||
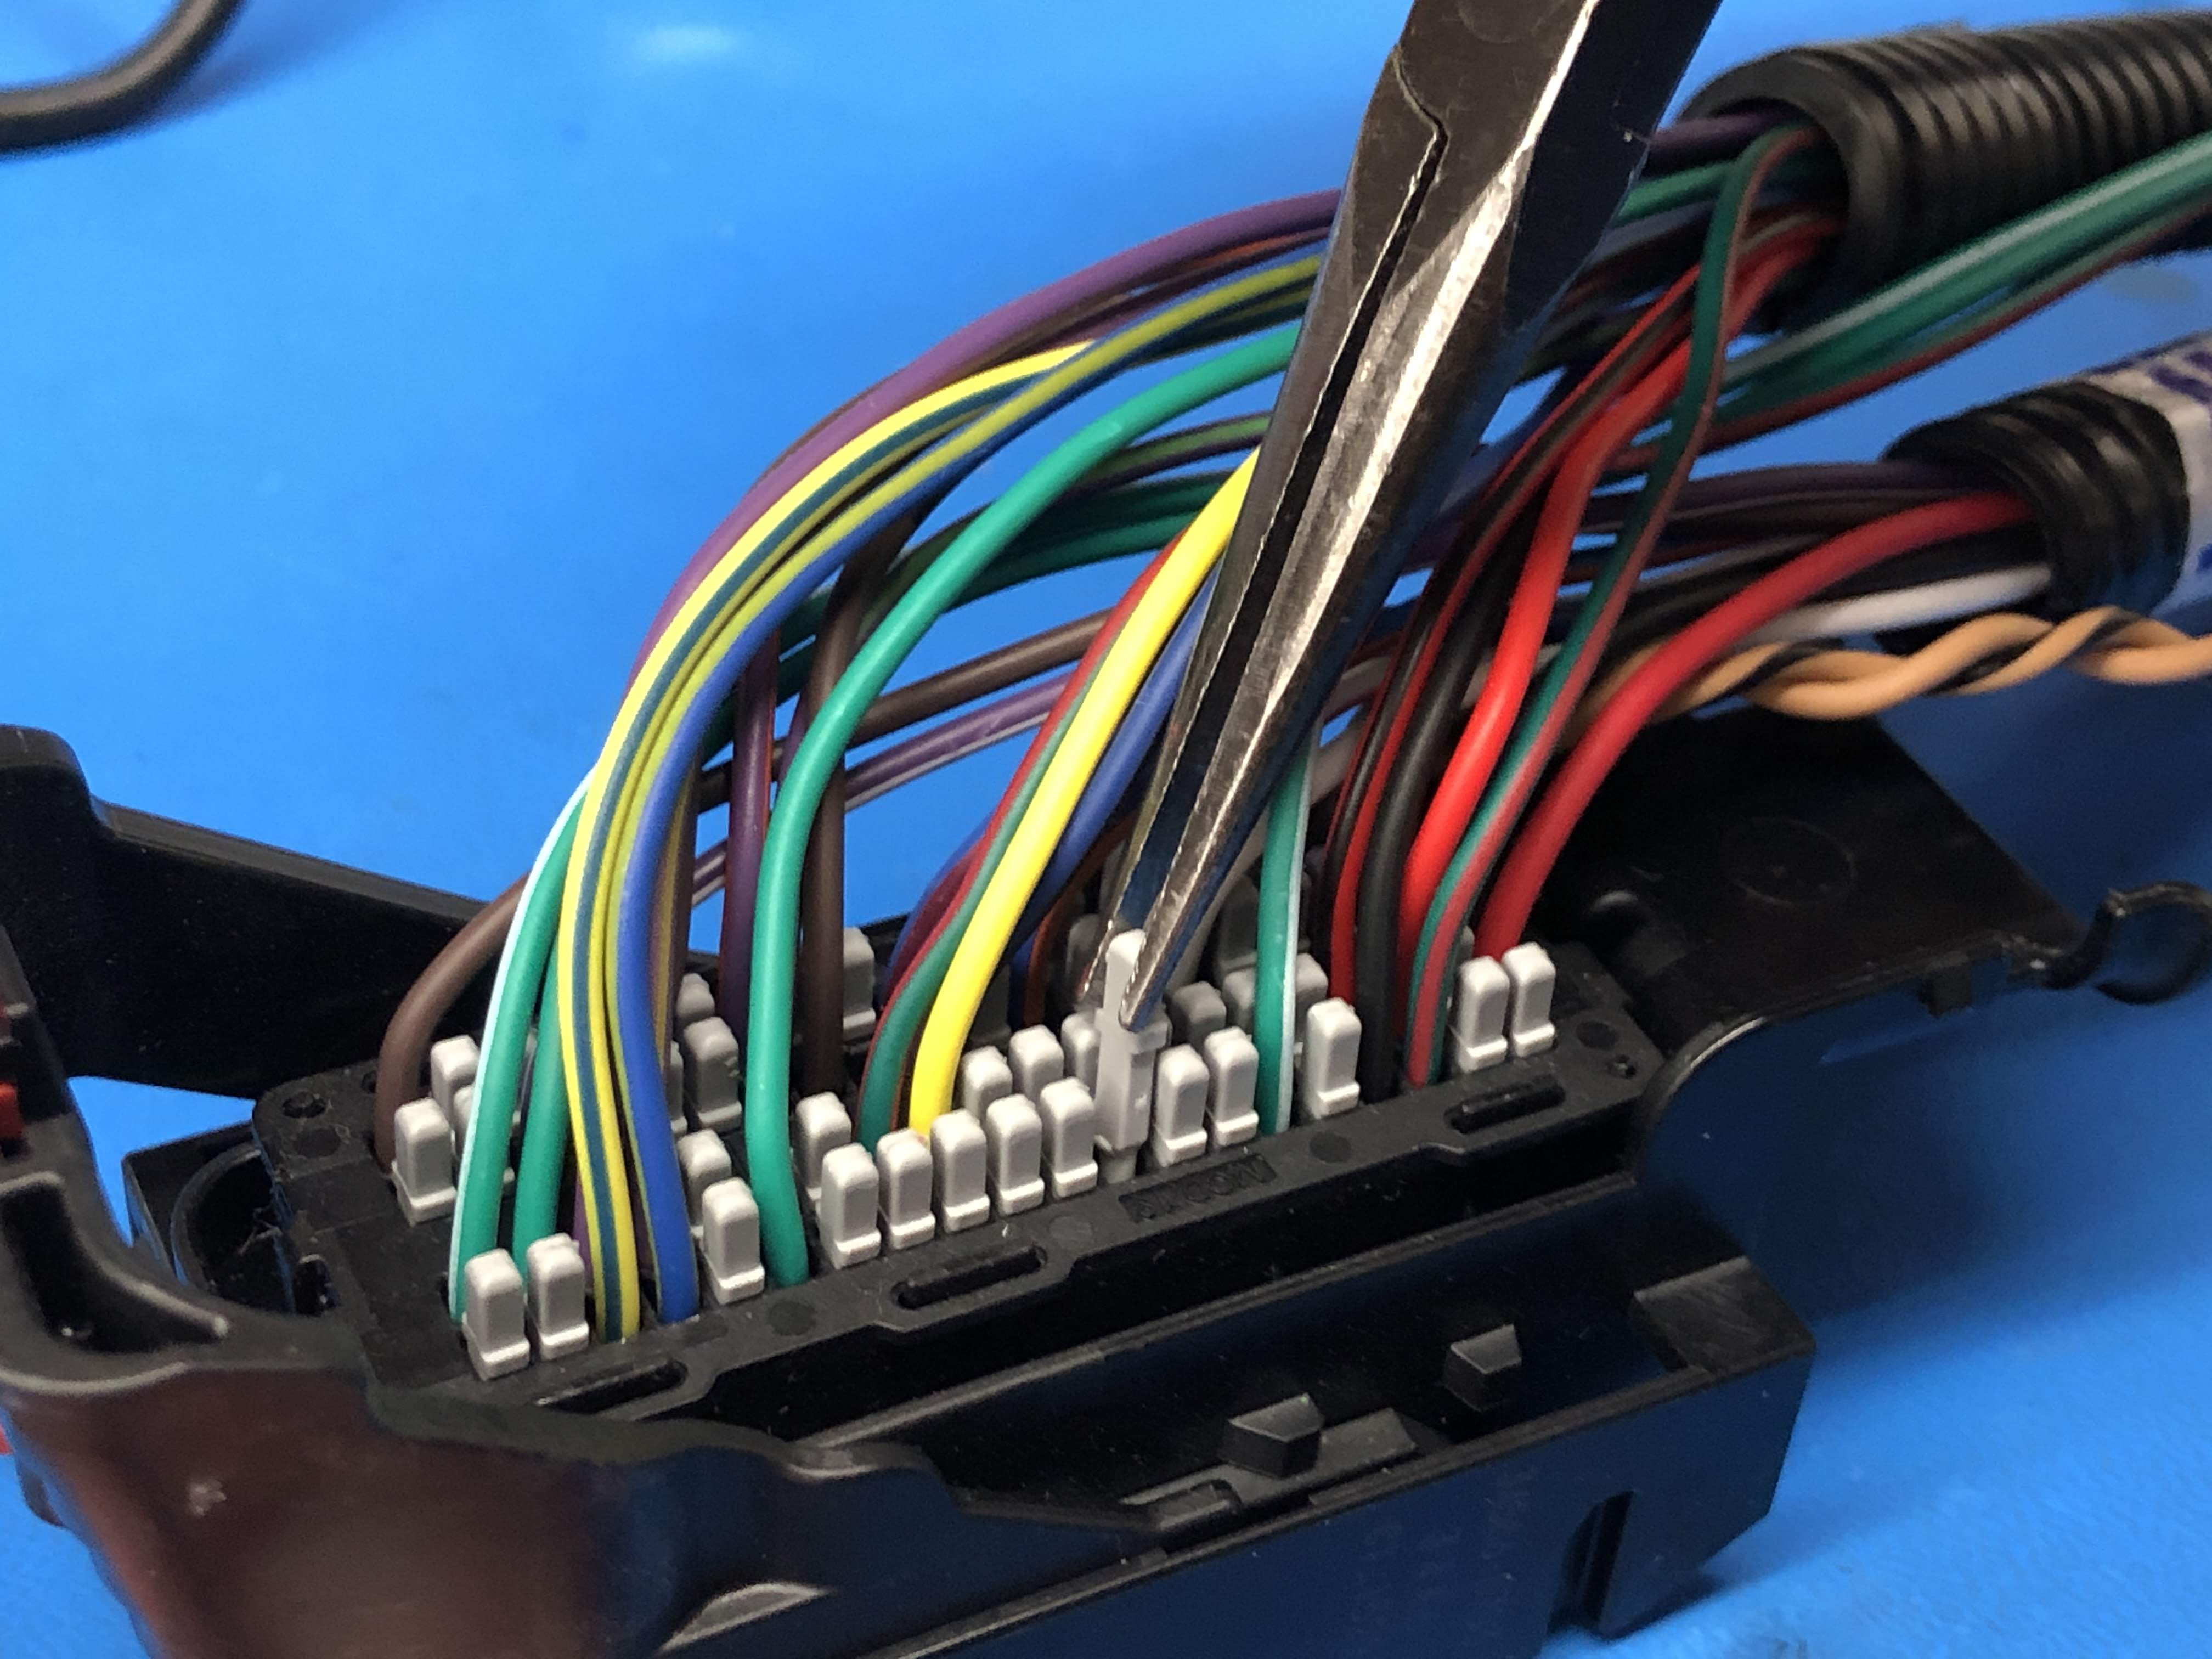
Remove the sealing plugs from the 9, 35, and 52 positions using a pair of long nose pliers as shown (pin 9 being removed here):
Locate the pressure sensor harness and insert pins from the ends of the harness into the connector as follows based on their wire color:
PIN | WIRE COLOR | FUNCTION |
|---|---|---|
9 | WHITE | Sensor signal |
35 | WHITE/RED | 5V Sensor power |
52 | WHITE/BLACK | Sensor ground |
The pins each have a small tab and will only insert one direction into the connector. There will be an audible click when each pin engages.
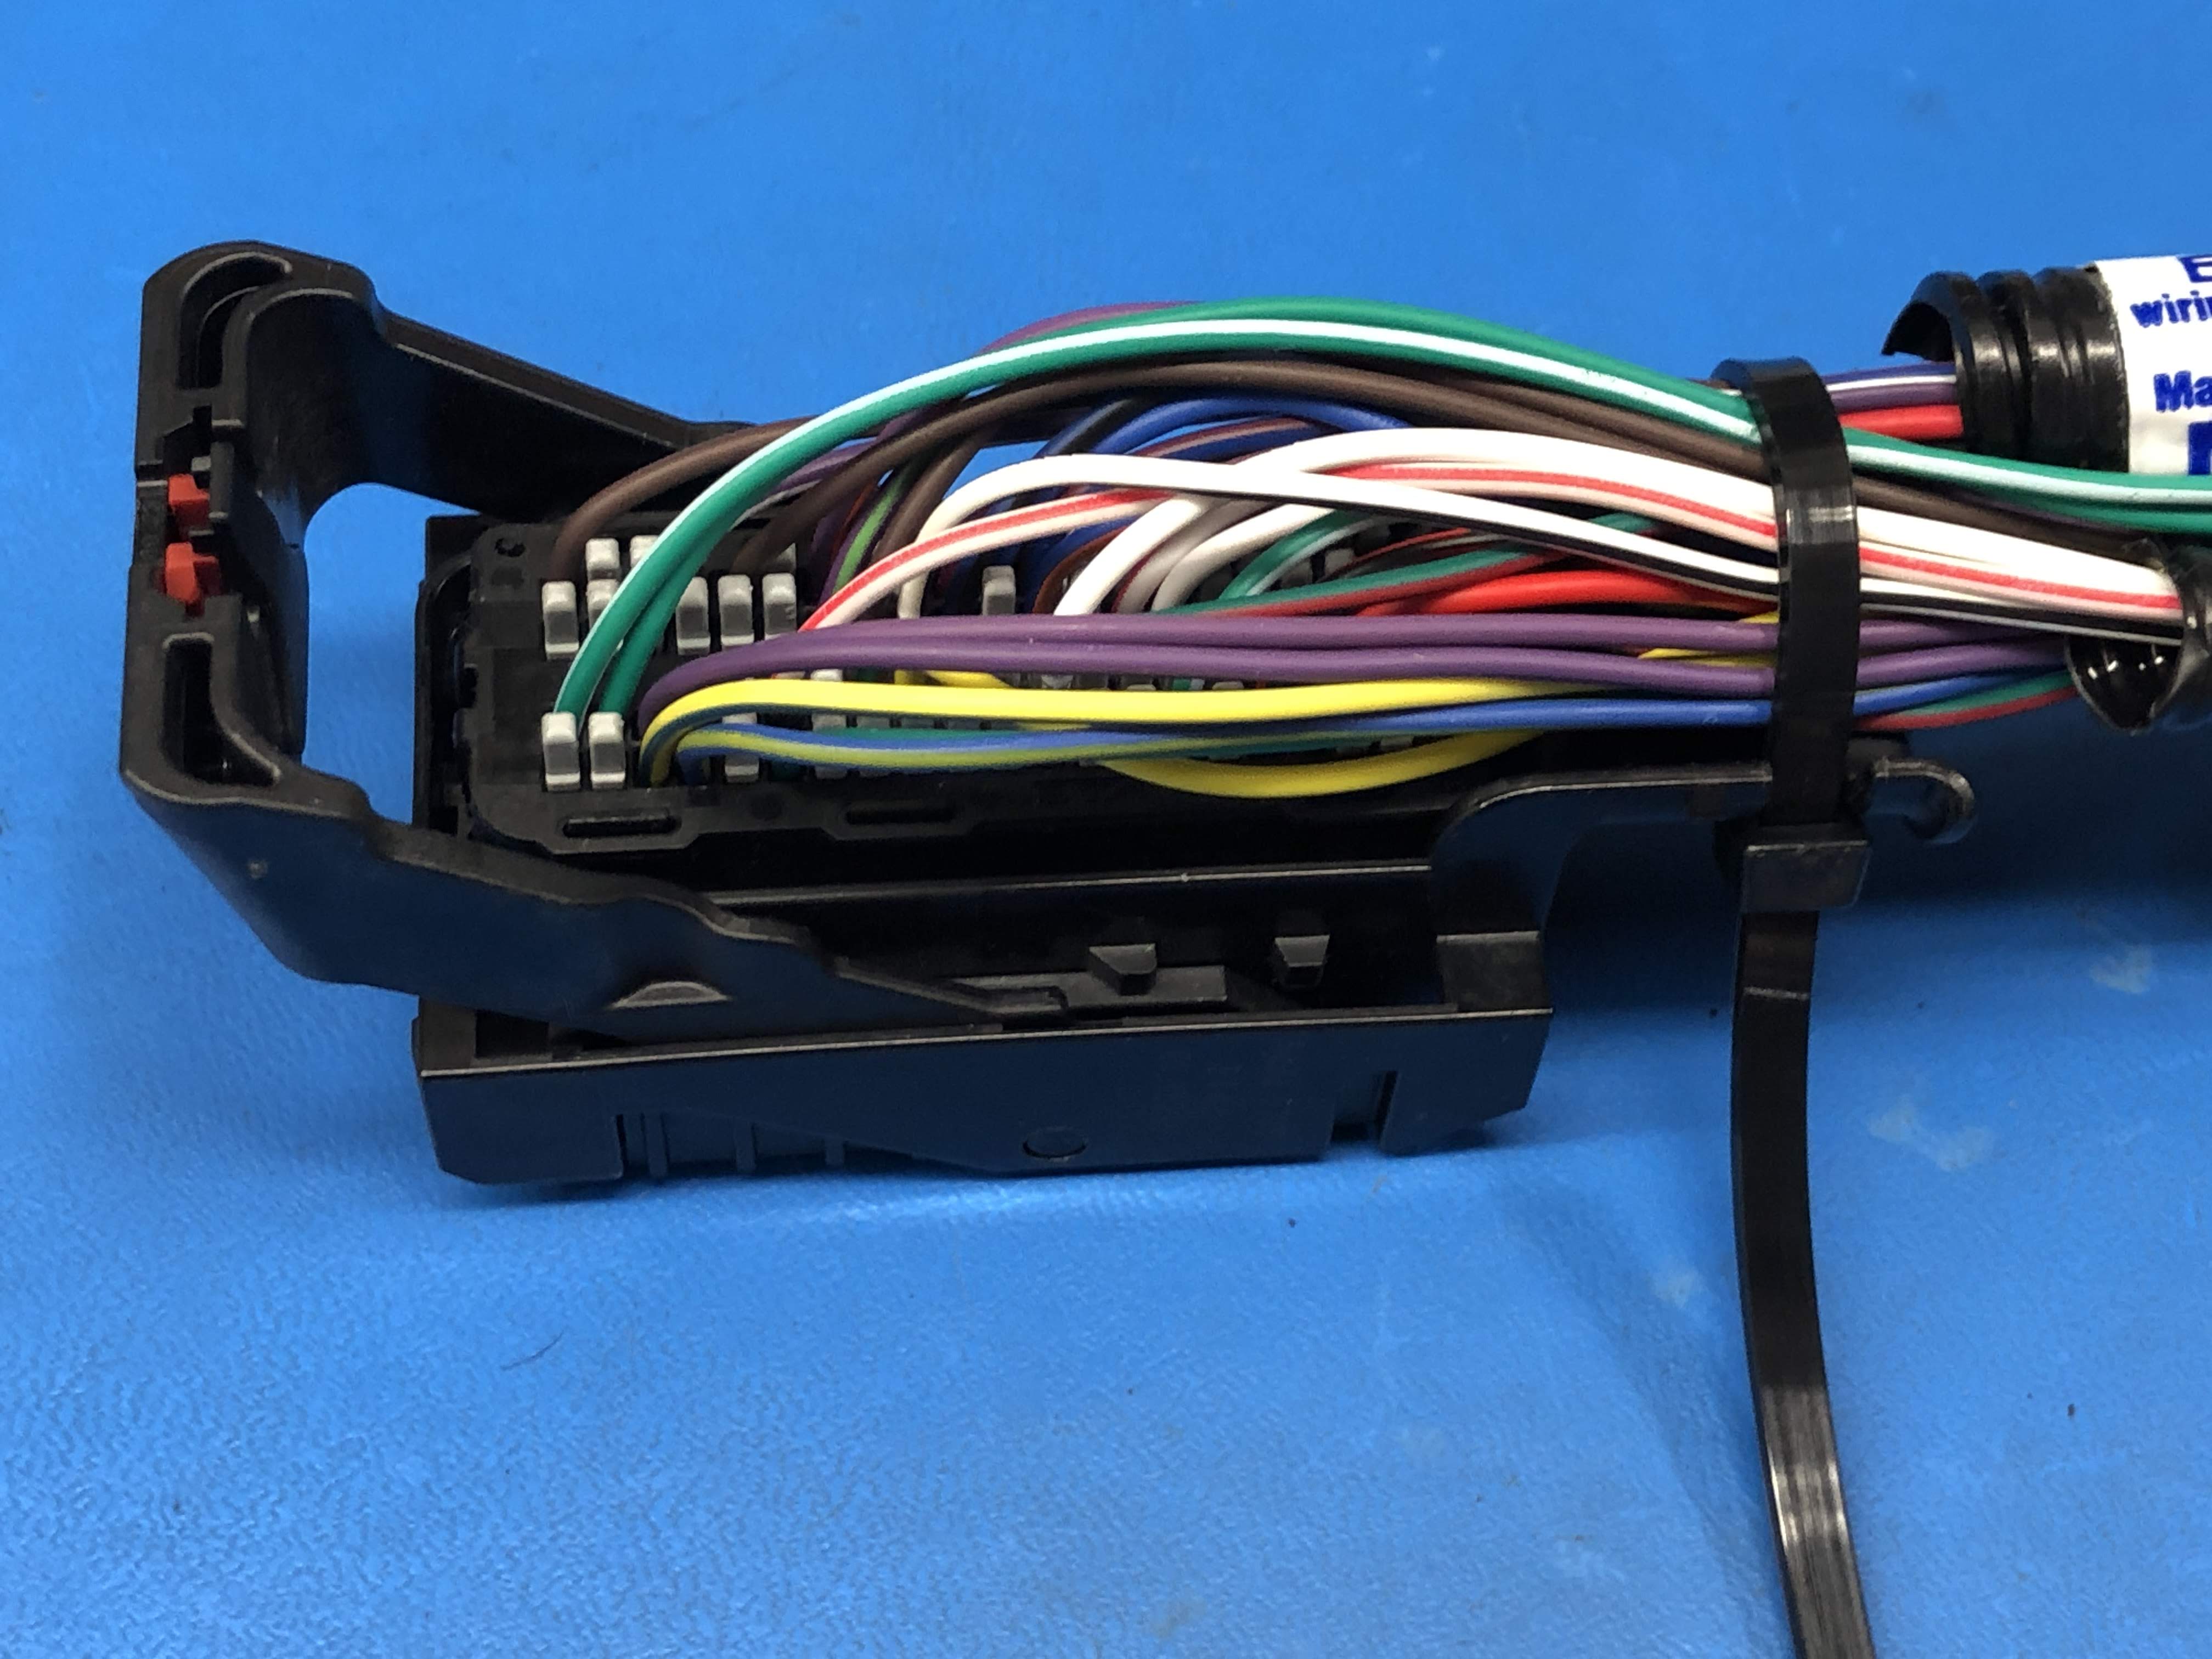
The completed harness should look like this:
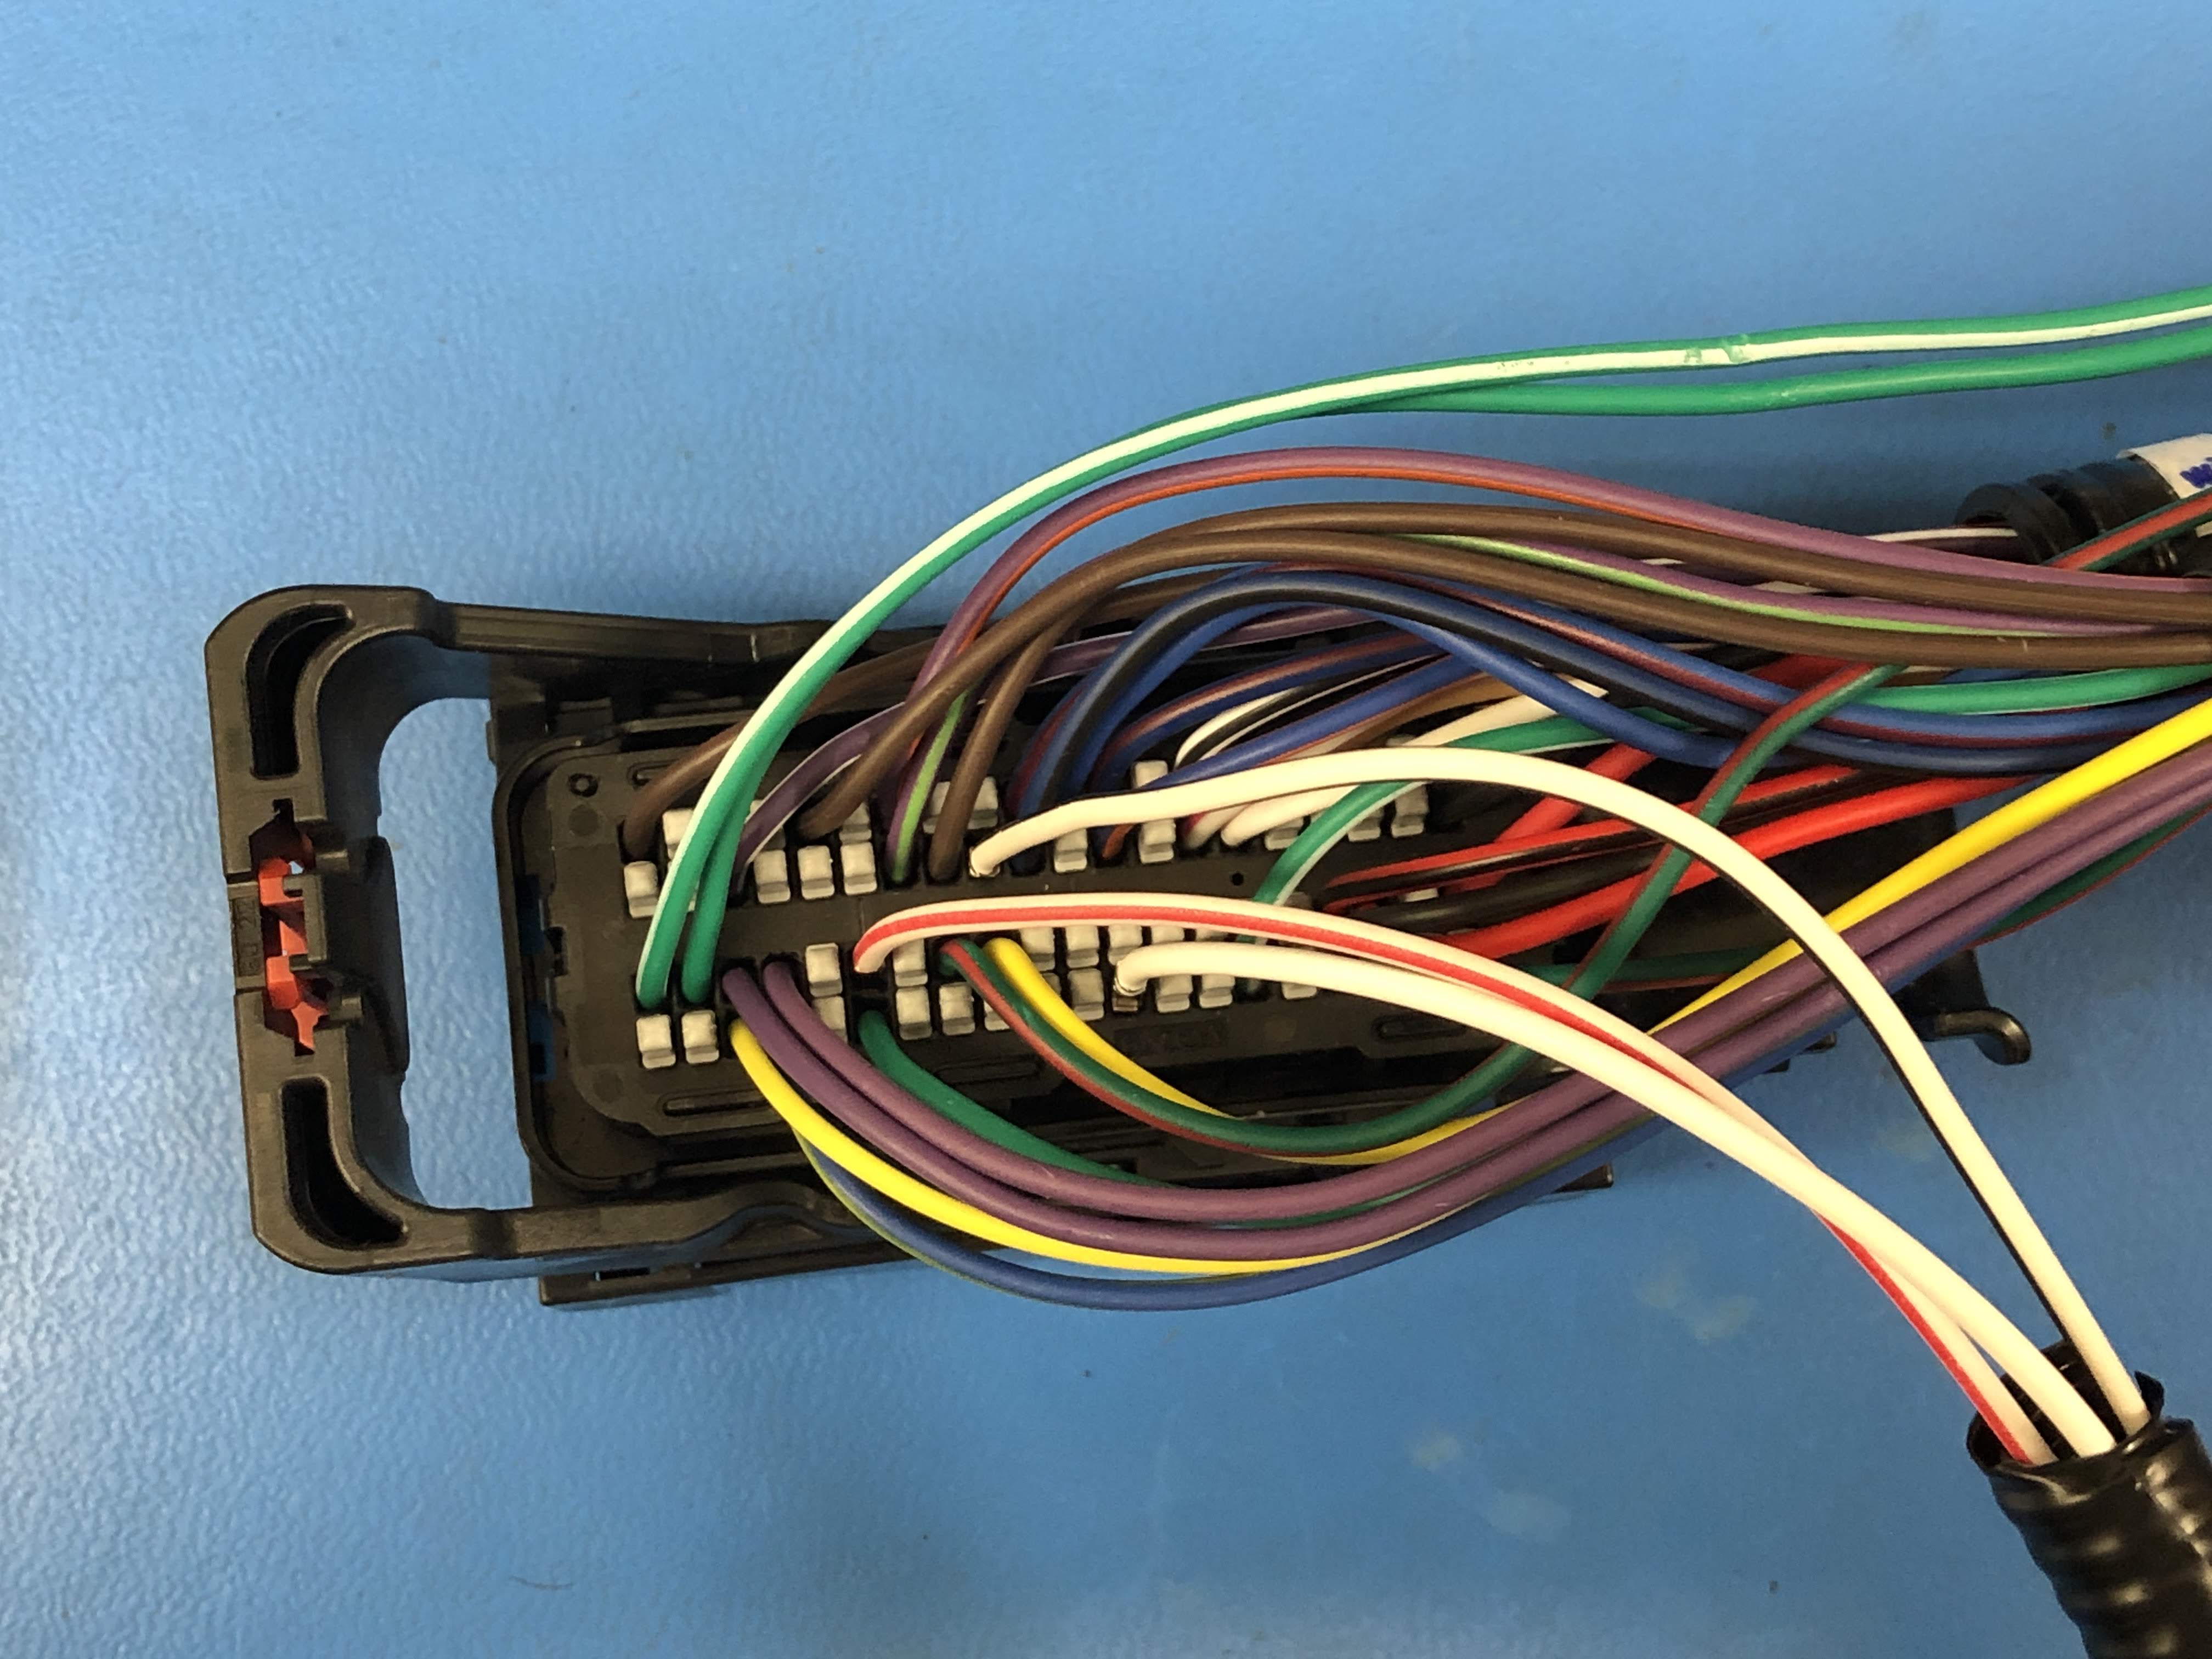
Tie off the all of the wires with the cable tie and tighten it as shown.
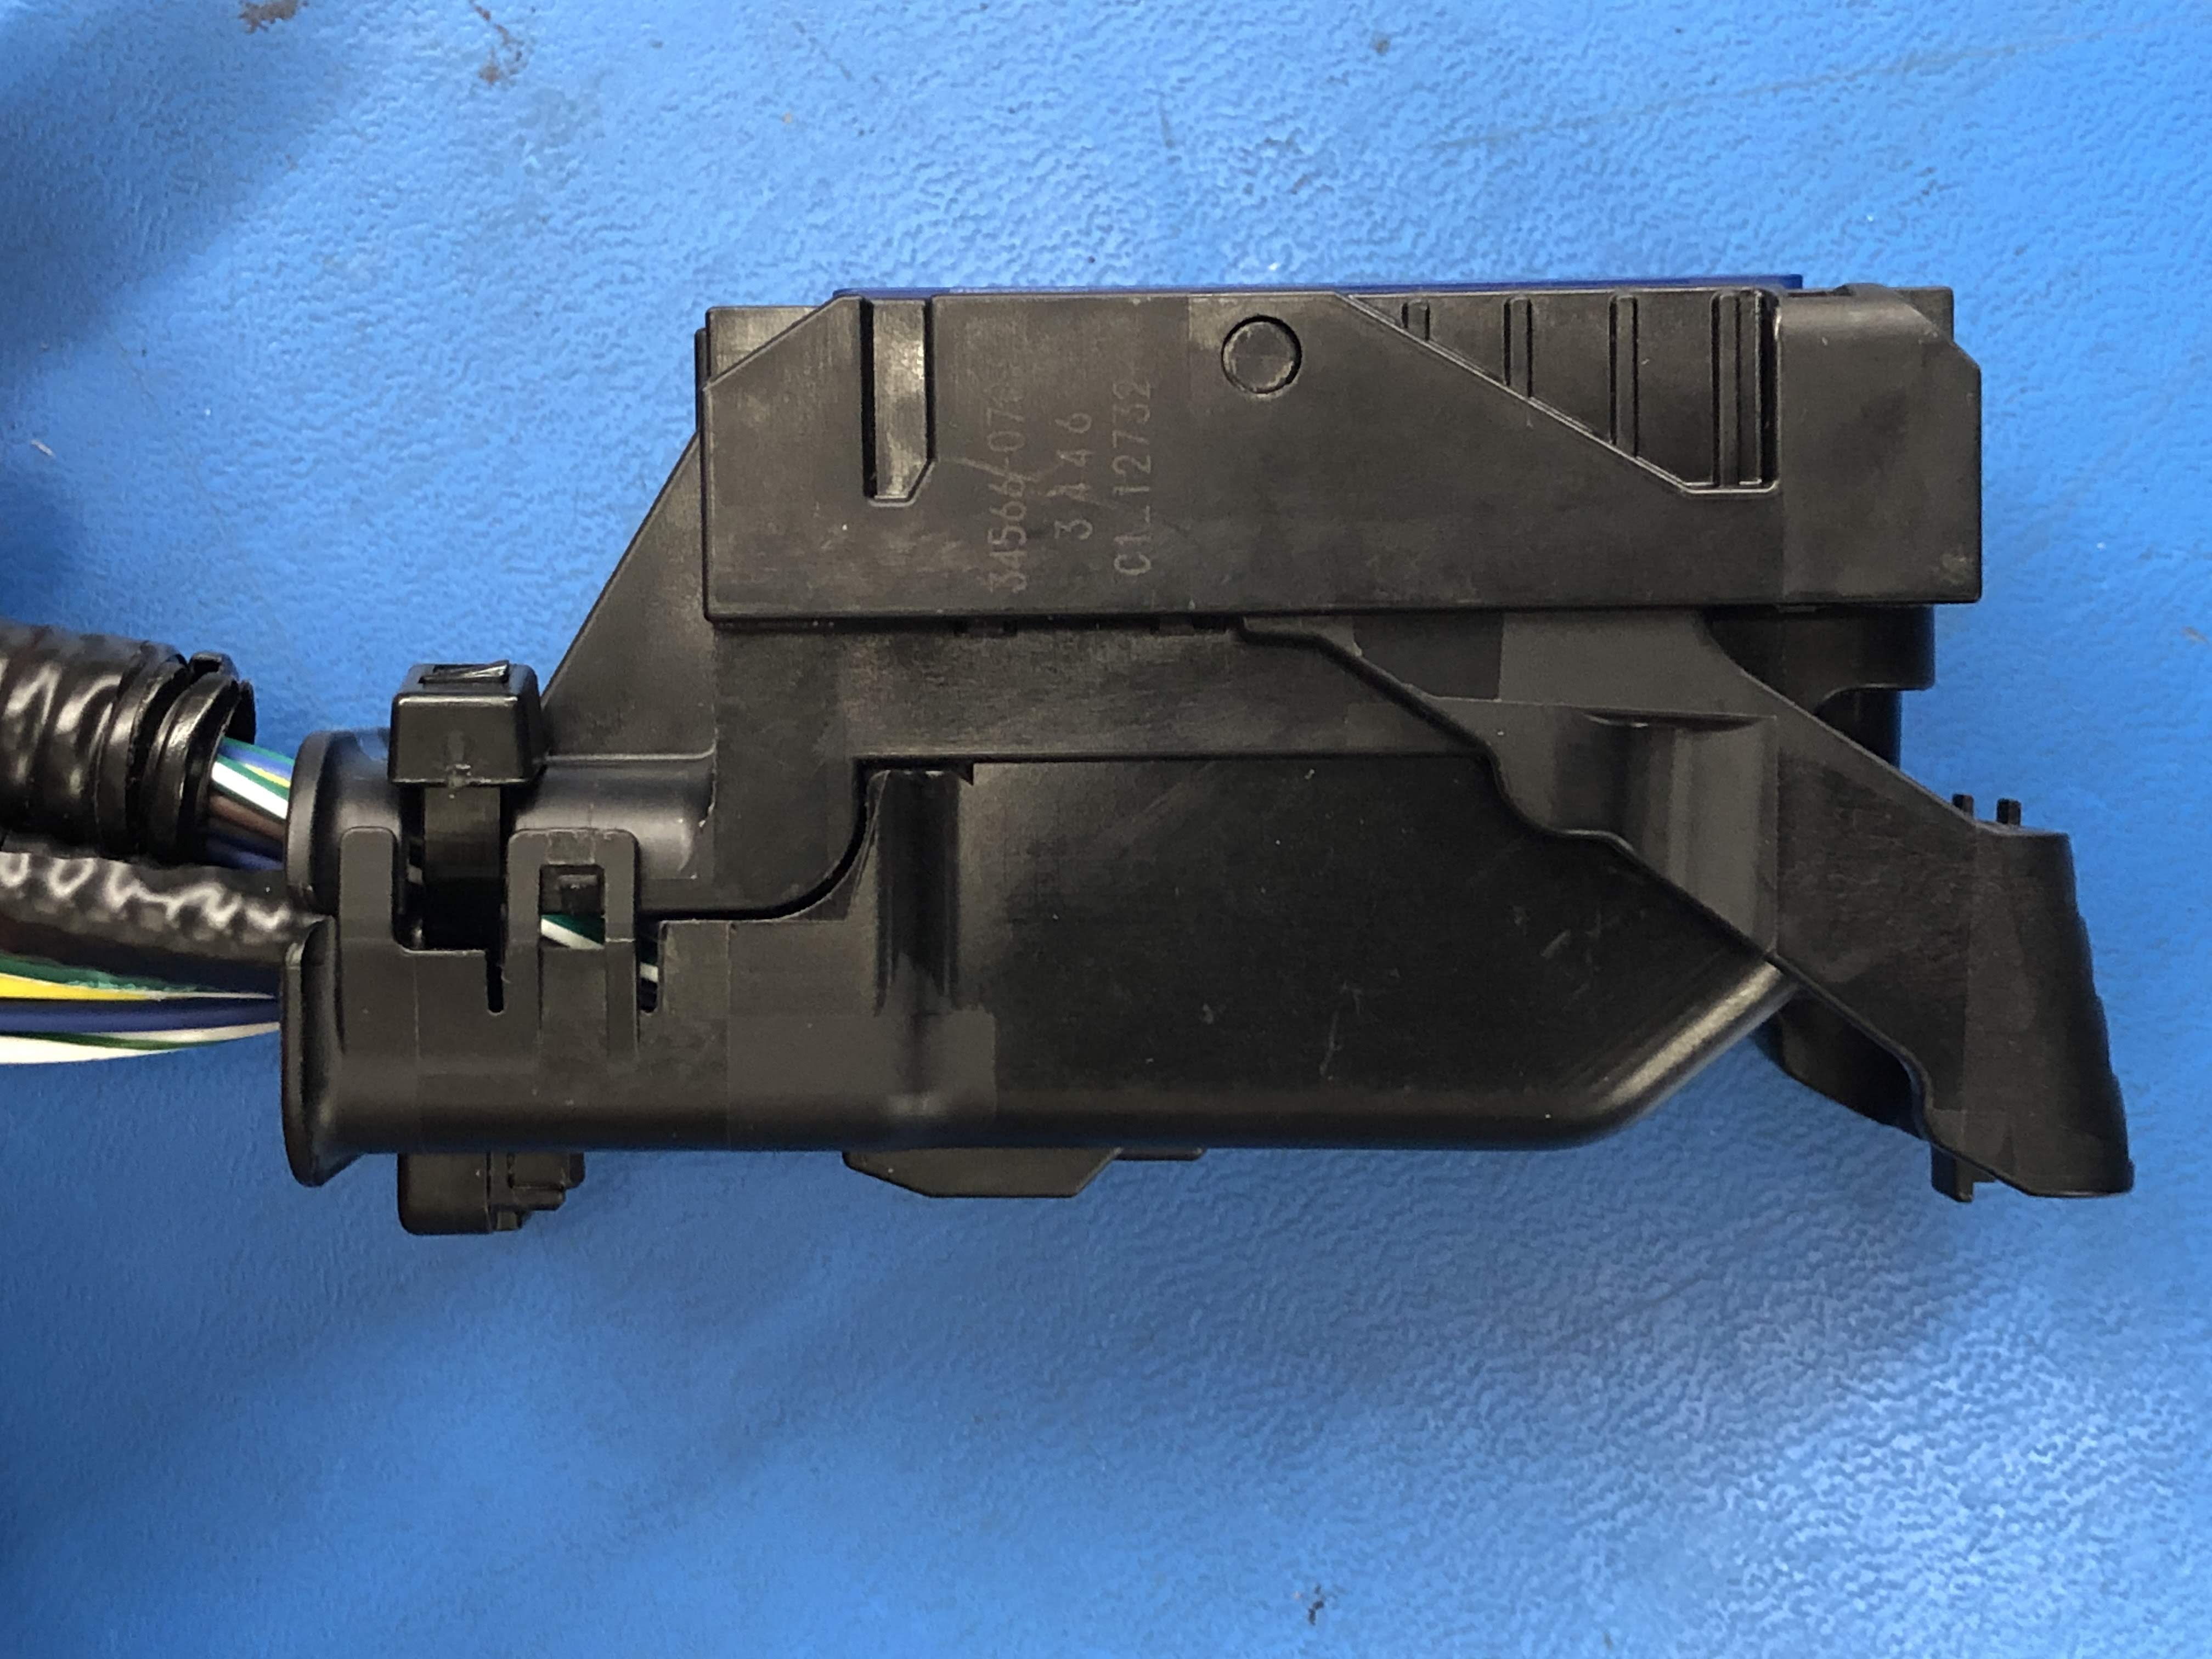
Cut the cable tie off flush and replace the cover. The completed connector should look like this:
Completing the Installation and Setup
After the pressure sensor harness has been added to the main connector, route the wiring to the pressure sensor, being careful to the exhaust system and drive shaft. Connect the pressure sensor to the harness using the 3 pin water tight plug and socket.
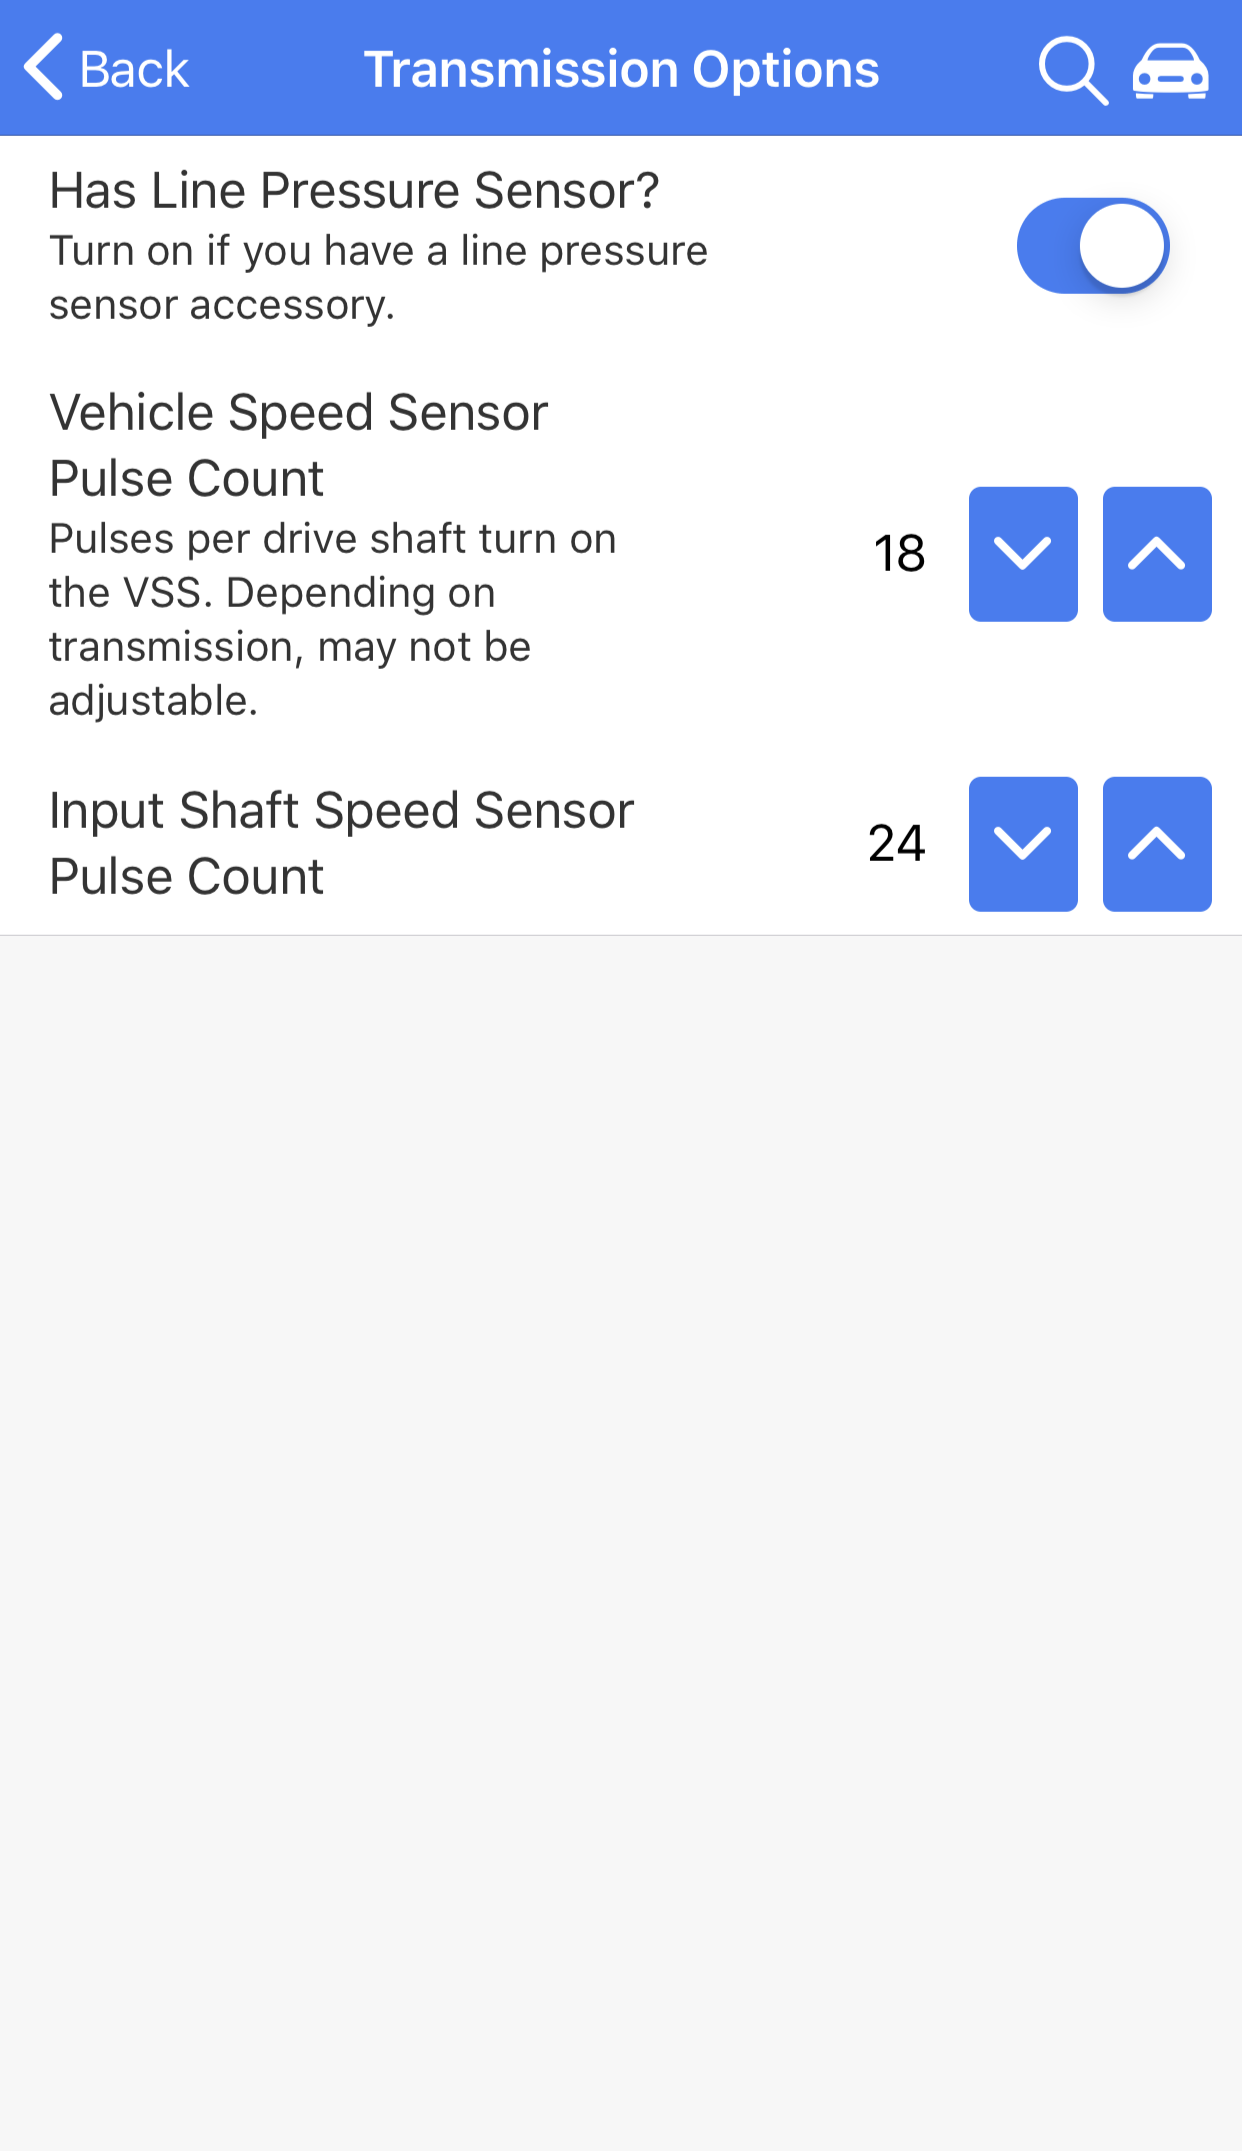
From within the CS Setup app, navigate from the Home screen to Vehicle Setup, and from there to Transmission Options. In the transmission options, turn on the "Has Transmission Pressure Sensor?" option as shown.
Restart your CS3, and go to the Dashboard screen. You can now add the actual line pressure gauge to the Dashboard screen. The gauge will show the line pressure in your local units (PSI / kPA / Bar). If you are using the handheld display, you can add or change the display setup to show line pressure.
Notes on the ZF4HP24
The ZF4HP24 does not have a 1/8" pipe threaded line pressure port. It needs an adapter. An easy way to make this adapter is to drill and tap the existing port plug.
First, locate the plug on the front pump assembly. Looking from the front of the transmission, the line pressure port is located at about the 4 o'clock position.
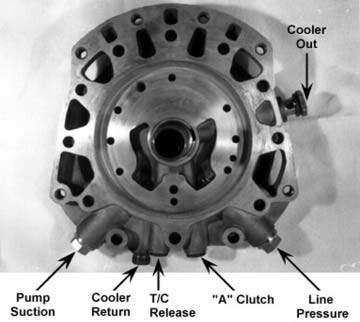
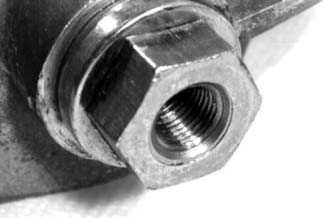
After locating the line pressure plug, remove it and drill an 11/32" hole through the plug. Then, thread the plug using a 1/8" pipe thread tap. The results should look like the photo here:
Another option is to use a pre-made adapter kit: Kinugawa 315-04301-006